Anyone Docs
  • 🔷The Documentation For Anyone
    • About
    • FAQ
  • 🔷Relay Setup
    • Get Started
    • Installation and Usage
      • Setting Your Environment
        • Virtualization on Windows
        • Virtualization on macOS
        • Install Ubuntu Server 22.04
        • Server management with SSH in Windows and macOS
      • Install Anon on Linux
      • Install Anon using the apt repository
      • Update Anon and accept terms and conditions
      • Install Anon in Docker
      • Configure SOCKS5 Proxy for Anyone
      • Install Anyone Exit Relay
    • Troubleshooting Common Issues
      • Diagnosing CGNAT and Public IPv4
      • Confirm ORPort Reachability
    • Firewall and Network Configurations
      • Router Port Forwarding
      • Install and Configure Firewall
    • Advanced Configuration and Troubleshooting
      • Configure IPv4 and IPv6
      • DoS mitigation parameters
    • Relay Operator Standards
    • Exit Relay Guidelines
  • 🔷Hardware Setup
    • Setup Guide
    • Description and Specifications
    • Relay Control Panel
      • Home
      • Network Settings
      • Relay Settings
      • Relay Family
      • Proxy Settings BETA
      • Change Password
      • Logs
      • Update
    • Update (Using USB)
    • Update to WEB 3.2.0 (Using UI)
    • Troubleshooting and additional configuration
      • Router Port Forwarding
      • Diagnosing CGNAT and Public IPv4
    • Router Setup
  • 🔷Security and Privacy
    • VPS Hardening
  • 🔷Rewards Dashboard
    • Registering to the Rewards Program
    • Accessing the Rewards Dashboard
    • Using the Rewards Dashboard
    • Rewards Status
  • 🔷Anyone SDK
    • NPM SDK
      • Install NPM Package
      • Run as Library
        • Anon
        • AnonSocksClient
        • AnonControlClient
      • Run from CLI
      • Tutorials
        • Hello Anon World I
        • Hello Anon World II
        • Circuit Control I
        • Circuit Control II
    • Native SDK
      • Anyone Client Releases
      • MAN - Anon Manual
      • Tutorials
        • Anyone Services I
        • Anyone Services II
    • iOS SDK [Beta]
      • Manual Install - CocoaPods
  • 🔷Connect to Anyone
    • Connecting to Linux
      • [Beta] One-Click Linux Setup
    • Connecting to macOS
      • macOS with NPM
      • [Beta] One-Click macOS Setup
    • Connecting to Windows
      • [Beta] One-Click Windows Setup
    • Individual Applications with Anyone
    • Connect Through Hardware
  • 🔷Tokenomics
    • Introduction
    • Token Distribution
      • Token Outflow
      • Other Tokens
    • Relay Rewards
      • Lock Requirement
      • Lock Adjustments
      • Reward Multipliers
    • Additional Roles
      • Authorities and Staking
      • Governance Voting
    • Premium Circuits
      • Premium Circuits
      • Premium Circuits: Metrics
    • Summary
      • Value Accrual Summary
      • Rewards Case Study
    • Appendix
      • M Derivation
      • Risk Equation Derivation
  • 🔷Resources
    • Community and Customer Support
    • Links
    • Token
    • Whitepaper
    • Roadmap
    • API
      • REST
      • [Future] GraphQL
Powered by GitBook
On this page
  • Starting and Authenticating
  • Reading Circuit Info

Was this helpful?

  1. Anyone SDK
  2. NPM SDK
  3. Tutorials

Circuit Control I

So far, we've seen two libraries as part of the Anyone NPM SDK:

  • Anon - the Anyone Client, which negotiates and maintains circuits through the network and runs a proxy server to forward traffic

  • AnonSocksClient - used in place of a typical requests library to forward get, post and other methods to the Anyone client!

Now, we will introduce one of the most powerful libraries - AnonControlClient - which interacts with the control port of the Anyone client and provides a new level of configurability. You can see circuit information that is hidden from most applications, send commands and manage circuits. Let's dive in!

Starting and Authenticating

For obvious reasons, not every app running locally alongside the Anyone Client can see or modify its behavior. Processes need to authenticate themselves on the client's control port and the AnonControlClient is no exception. Let's import it, much like the other libraries.

import { AnonControlClient } from "@anyone-protocol/anyone-client"; 

The control client is then instantiated much like anon, specifying the host and port number of the client to bind to. 127.0.0.1 and 9051 are the default values and will work with the default Anon object.

const anonControlClient = new AnonControlClient(); 

// You can also specify your host and port:
// const anonControlClient = new AnonControlClient(host: '127.0.0.1', port: 9051);

From there, assuming you have anon running anywhere in the local network, authenticating to the control port is simple

await anonControlClient.authenticate();

Let's create a new file control.js and put this all together. Notice that, unlike the SOCKS client, the AnonControlClient is only instantiated after we have given the Anyone client time to establish itself. In addition, best practices are also to call .end() on the control client once it is complete.

control.js
import { Anon } from "@anyone-protocol/anyone-client";
import { AnonControlClient } from "@anyone-protocol/anyone-client";


async function main() {
   const anon = new Anon();
   
    try {
        await anon.start();
        await new Promise(resolve => setTimeout(resolve, 12000));

        const anonControlClient = new AnonControlClient(); 
        await anonControlClient.authenticate() 
        
        anonControlClient.end()
        
    } catch(error) {
        console.log(error)
    } finally {
        
        await anon.stop()
    }
}

main()
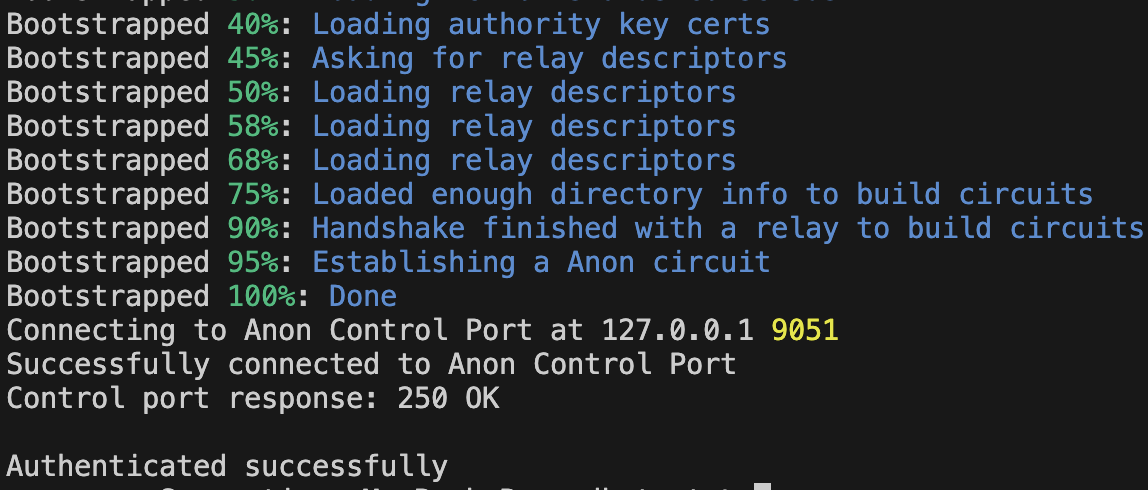
Running node control.js should yield the following success message:

Reading Circuit Info

Now that we have authenticated, lets see what circuits have been created. The Anyone client often maintains multiple circuits within the network, and these can be seen as a JSON file with the circuitsStatus() function.

const circuits = await anonControlClient.circuitStatus();
console.log(JSON.stringify(circuits, null, 2));

Adding the above two lines after .authenticate and running as before will see a new JSON file outputted, like below:

[{
    "circuitId": 1,
    "state": "BUILT",
    "relays": [
      {
        "fingerprint": "54849A361F8CED0D1B70B722CB8B33E9071E5561",
        "nickname": "ATORDAuselive"
      }
    ],
    "buildFlags": [
      "ONEHOP_TUNNEL",
      "IS_INTERNAL",
      "NEED_CAPACITY"
    ],
    "purpose": "GENERAL",
    "timeCreated": "2024-11-08T12:10:46.596Z"
  },
...

This shows a list of objects, each representing a single circuit - that shows the circuit's status and the first relay within it!

To get further relay info, you could call getRelayInfo

const relayInfo0 = await anonControlClient.getRelayInfo(circuits[0].relays[0].fingerprint);
console.log('Relay [0] info:', relayInfo0);

PreviousHello Anon World IINextCircuit Control II

Last updated 6 months ago

Was this helpful?

🔷