Anyone Docs
  • 🔷The Documentation For Anyone
    • About
    • FAQ
  • 🔷Relay Setup
    • Get Started
    • Installation and Usage
      • Setting Your Environment
        • Virtualization on Windows
        • Virtualization on macOS
        • Install Ubuntu Server 22.04
        • Server management with SSH in Windows and macOS
      • Install Anon on Linux
      • Install Anon using the apt repository
      • Update Anon and accept terms and conditions
      • Install Anon in Docker
      • Configure SOCKS5 Proxy for Anyone
      • Install Anyone Exit Relay
    • Troubleshooting Common Issues
      • Diagnosing CGNAT and Public IPv4
      • Confirm ORPort Reachability
    • Firewall and Network Configurations
      • Router Port Forwarding
      • Install and Configure Firewall
    • Advanced Configuration and Troubleshooting
      • Configure IPv4 and IPv6
      • DoS mitigation parameters
    • Relay Operator Standards
    • Exit Relay Guidelines
  • 🔷Hardware Setup
    • Setup Guide
    • Description and Specifications
    • Relay Control Panel
      • Home
      • Network Settings
      • Relay Settings
      • Relay Family
      • Proxy Settings BETA
      • Change Password
      • Logs
      • Update
    • Update (Using USB)
    • Update to WEB 3.2.0 (Using UI)
    • Troubleshooting and additional configuration
      • Router Port Forwarding
      • Diagnosing CGNAT and Public IPv4
    • Router Setup
  • 🔷Security and Privacy
    • VPS Hardening
  • 🔷Rewards Dashboard
    • Registering to the Rewards Program
    • Accessing the Rewards Dashboard
    • Using the Rewards Dashboard
    • Rewards Status
  • 🔷Anyone SDK
    • NPM SDK
      • Install NPM Package
      • Run as Library
        • Anon
        • AnonSocksClient
        • AnonControlClient
      • Run from CLI
      • Tutorials
        • Hello Anon World I
        • Hello Anon World II
        • Circuit Control I
        • Circuit Control II
    • Native SDK
      • Anyone Client Releases
      • MAN - Anon Manual
      • Tutorials
        • Anyone Services I
        • Anyone Services II
    • iOS SDK [Beta]
      • Manual Install - CocoaPods
  • 🔷Connect to Anyone
    • Connecting to Linux
      • [Beta] One-Click Linux Setup
    • Connecting to macOS
      • macOS with NPM
      • [Beta] One-Click macOS Setup
    • Connecting to Windows
      • [Beta] One-Click Windows Setup
    • Individual Applications with Anyone
    • Connect Through Hardware
  • 🔷Tokenomics
    • Introduction
    • Token Distribution
      • Token Outflow
      • Other Tokens
    • Relay Rewards
      • Lock Requirement
      • Lock Adjustments
      • Reward Multipliers
    • Additional Roles
      • Authorities and Staking
      • Governance Voting
    • Premium Circuits
      • Premium Circuits
      • Premium Circuits: Metrics
    • Summary
      • Value Accrual Summary
      • Rewards Case Study
    • Appendix
      • M Derivation
      • Risk Equation Derivation
  • 🔷Resources
    • Community and Customer Support
    • Links
    • Token
    • Whitepaper
    • Roadmap
    • API
      • REST
      • [Future] GraphQL
Powered by GitBook
On this page
  • Setting Up Your Environment
  • Importing and Starting Anon
  • Starting and Stopping

Was this helpful?

  1. Anyone SDK
  2. NPM SDK
  3. Tutorials

Hello Anon World I

PreviousTutorialsNextHello Anon World II

Last updated 6 months ago

Was this helpful?

Welcome to our npm tutorial series, walking you through using Anyone with Javascript. We'll walk you through starting the Anyone client, routing your first request through and some cool features built into the SDK! Let's get started.

Installing NPM Package

This tutorial assumes you have already installed npm and the anyone-client package (either globally or in your local development folder). If you haven't, check out Install NPM Package

Setting Up Your Environment

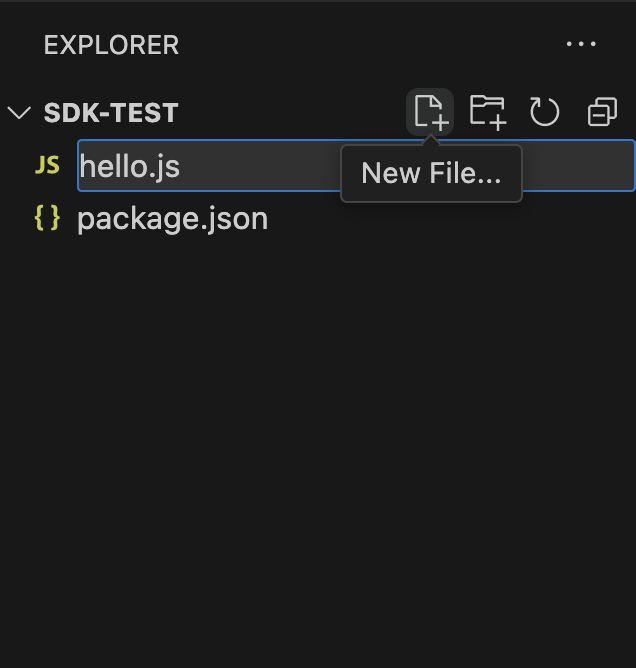
For this tutorial, we will be using to view and edit code, but you can choose any IDE. Create a new directory for this tutorial, in our case sdk-test.

We will be running our code as a node module, which can be instantiated using npm. In addition to your IDE, you will need a terminal window open in the same directory (this can also be done from within VS Code).

From your terminal, run

npm init es6 --save  

This will setup your project directory as an npm module, creating a package.json file and configuring it as a module. Next, from your IDE, create a local file to run your code. In our case, this is hello.js.
Importing and Starting Anon

We will be importing anon, the underlying software binary for Anyone, into our newly created hello.js file:

import { Anon } from "@anyone-protocol/anyone-client";

The simplest way to start the anon binary is to create a new instance of the imported library, and calling its first function .start()

import { Anon } from "@anyone-protocol/anyone-client";

const anon = new Anon();
anon.start();

To run your program, return to your terminal, and run node followed by your program name:

Your Terminal
node hello.js

This starts the client, which will automatically negotiate a circuit within the Anyone Network! You can see this happen in real time. Once the client has started, it won't shut off automatically - it will continue to run until stopped.
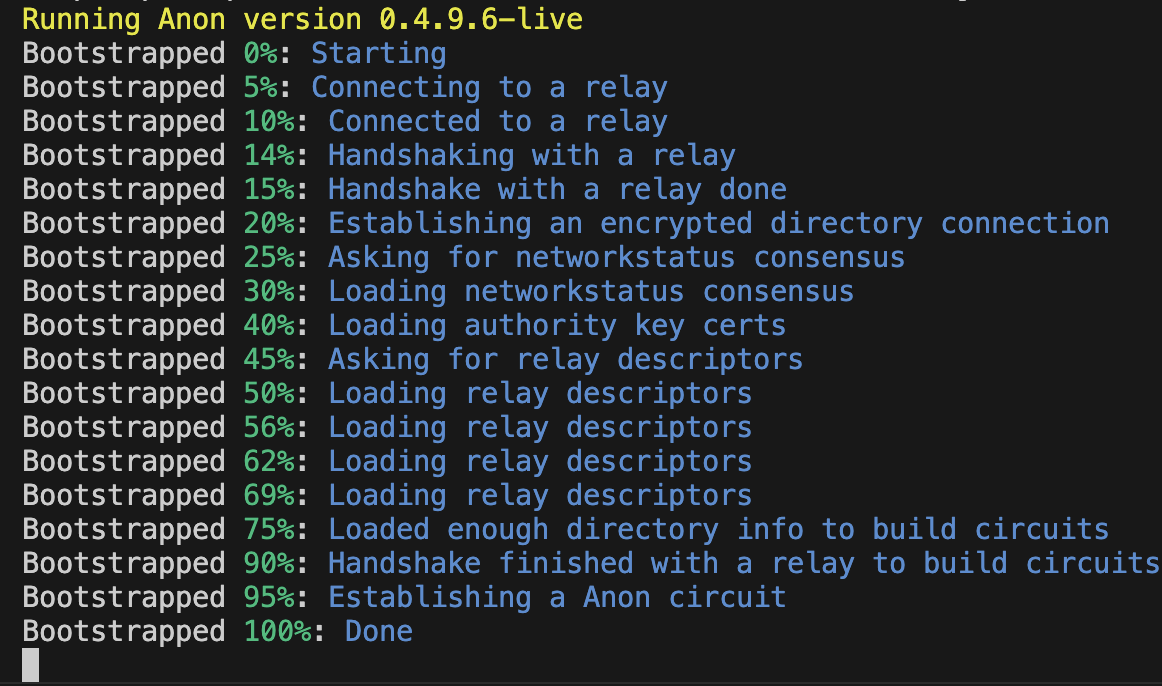
To terminate, type Ctrl-C or Cmd-C into the terminal window depending on your OS. You've now created your first circuit from code!

I get an error!

Make sure that you have npm and anyone-client installed. Check out Install NPM Package

Starting and Stopping

Let's make our code a little more robust, and give ourselves the ability to stop the client.

The anon binary should be called from asynchronous functions to ensure the client can continue to run without blocking the rest of your application, and called within a try-catch block so that network issues can be handled gracefully. We will structure a simple asynchronous function main and run the same code.

import { Anon } from "@anyone-protocol/anyone-client";

async function main() {
    const anon = new Anon();
    try {
        await anon.start();    
    } catch(error) {
        console.log(error)
    }
}

main()

We now introduce our second client function .stop() - for now, let's stop the client 15 seconds after the circuit is created.

Lets put an await statement before the start function so the program waits for it to complete before stopping (though currently, this resolves immediately), add a 15 second wait, and put the stop function within the finally clause of the try-catch block (so that it runs regardless of any issues). In the future, we can replace this 15 second wait with some real commands!

    try {
        await anon.start();
        await new Promise(resolve => setTimeout(resolve, 15000));
    } catch(error) {
        console.log(error)
    } finally {
        await anon.stop()
    }

And that's a wrap! You have now successfully started and stopped anon from JavaScript code! If you're ready to explore the range of functions available yourself, head straight to the API reference at Run as Library. If not, let's start making some requests over the internet!

Check out the full source on .

🔷
GitHub
Hello Anon World II
Visual Studio Code
Creating file hello.js within the project directory