> For the complete documentation index, see [llms.txt](https://docs.anyone.io/llms.txt). Markdown versions of documentation pages are available by appending `.md` to page URLs; this page is available as [Markdown](https://docs.anyone.io/hardware/hw-updates/update.md).
# System Update (USB)
This page will guide you on how to update your Relay using a USB stick. This update introduces Router Mode, a reworked Setup Wizard and more.
### What's new?
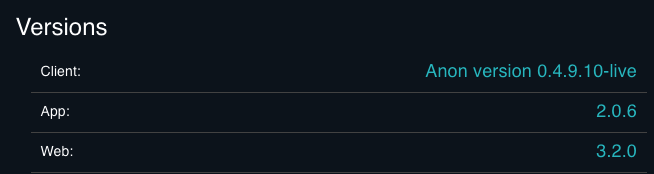
### In the versions APP 2.0.6 and WEB 3.2.0:
* **The Relay now supports Router mode:** When Router mode is enabled and when a user is connected to the hotspot, their traffic will be automatically routed through the Anyone Network and provide seamless privacy. Router mode has replaces Hotspot Proxy function from previous versions.
* **Mode selection:** Gives the operator the option to configure the hardware as a Relay Only, Relay and Router combo, or Router Only when using the Setup Wizard that is initiated by holding the physical blue button for 3 seconds.
* **Update via WEB UI:** This version support updating the Relay by going to 'System > Update' and selecting update files. Future updates will use this method.
* **Adding MyFamily in bulk:** Paste a set of fingerprints as a comma separated list or line by line in one go for a quicker MyFamily configuration. In addition, the limit on 90 fingerprints has been removed.
* **Support for the extra WiFi USB dongle** shipped with the latest Relay batches, this allows the Relay to use a Wireless connection joining a Local Network as well as having a Hotspot enabled at the same time.
* **Setup Wizard:** To provide a more intuitive experience when performing the initial setup of the Relay, our focus for this update has been on the setup wizard, with minor changes to the Relay Control Panel.
* On the [**Relay Settings**](broken://pages/rJYIM8hzDIrNH9HccAob) page, the **Bandwidth Settings** feature now uses the parameters **RelayBandwidthBurst/RelayBandwidthRate** instead for **BandwidthBurst/BandwidthRate**. The latter restricts all traffic including client traffic which is not suitable with the introduction of the Router Mode. See the [Anon Manual](/sdk/native-sdk/manual.md) for reference.
* Optimisations to reduce the CPU and Memory resources consumed by the APP.
* Improved validation on files uploaded via Relay Control Panel.
* While relay was in '**Relay-Router**' mode, the title in the RCP displayed '**Router**' with unsaved changes.
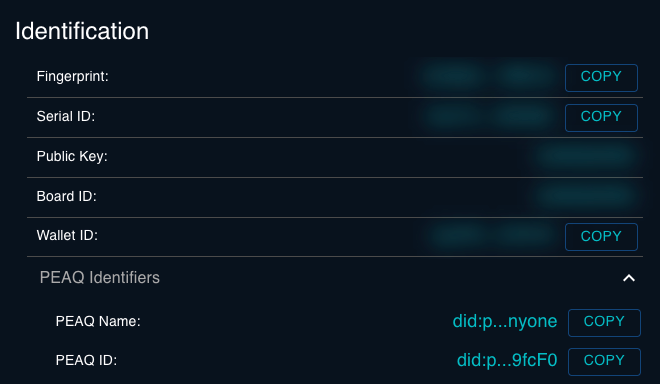
* Added PEAQ integration, read more about it over at [Medium](https://anyone-protocol.medium.com/3a307ecabdff).
***
### Update prerequisites:
* The relay has to be on **APP** version **2.0.0** or above for this update to run successfully. Verify the version on the Home page of the Relay Control Panel.
* This update method **requires** a USB memory stick.
* The files from this update can **not** be used to update from the RCP using the update page.
### How to update:
1. Grab any USB drive and plug it into your computer, ensure the filesystem on the USB drive is FAT or FAT32.
2. Download both **default.cfg** and **update.zip** and place on the USB drive, make sure the files are **NOT** renamed or unpacked, the files names must be exactly **default.cfg** and **update.zip** even after download.
{% hint style="warning" %}
Only if you have changed the default password for the Relay Control Panel, then open the file **default.cfg** with any editor and change the first line "**`01_user_password=MyPassword`**" to include your password.
{% endhint %}
{% file src="/files/kifEKn0iyoR34T0sFSva" %}
{% file src="/files/FFYBitjJ1GPWxjbgSrtv" %}
3. Plug in the USB to your Relay and unplug when the LED's are **flashing in green**, the relay will restart when USB is unplugged. Wait for the Relay to start up again.
{% hint style="warning" %}
* If the lights of the relay flashes in **Red**, it means the password is wrong in default.cfg, readd default.cfg and correct the password.
* If the lights of the relay flashes in **Blue**, it means the files have not been placed properly, delete all files from the USB and re-add them again.
{% endhint %}
4. When relay has restarted you can login to the [Relay Control Panel](http://relayup.local) and verify that you see the latest version as shown below, located in the **Versions** and **Identification** section on the **Home** page.
5. (**Optional**). To change the modes, press the physical **blue** button located on your Relay for 3 seconds, connect to the wireless network named '**relayup\_XXXXXX**' and follow the instructions on the captive portal.
### You´re done!
Visit our [Support Page](/resources/support.md) for any questions.